Introduction
Every few years, a new wave resets the clock. 2026 feels like one of those moments. New cycle, new opportunities, new challenges — and it’s time to get the ball rolling. Computer vision sits at the heart of some of the most exciting technological shifts of our era, from real-time scene understanding and autonomous systems to generative AI. This blog is my way of staying curious, building things, and sharing what I learn along the way.
AI Photo Editor is an iOS app that lets you apply filters, auto-enhance photos, detect faces, and remove or replace backgrounds — all on-device. The AI runs entirely on the device — Apple’s Vision framework executes pre-trained neural networks on the Neural Engine to detect faces and segment people in real time. This is applied AI: using existing models to build intelligent applications, which is how most real-world AI products work. No network calls, no third-party APIs.
The app has five core features:
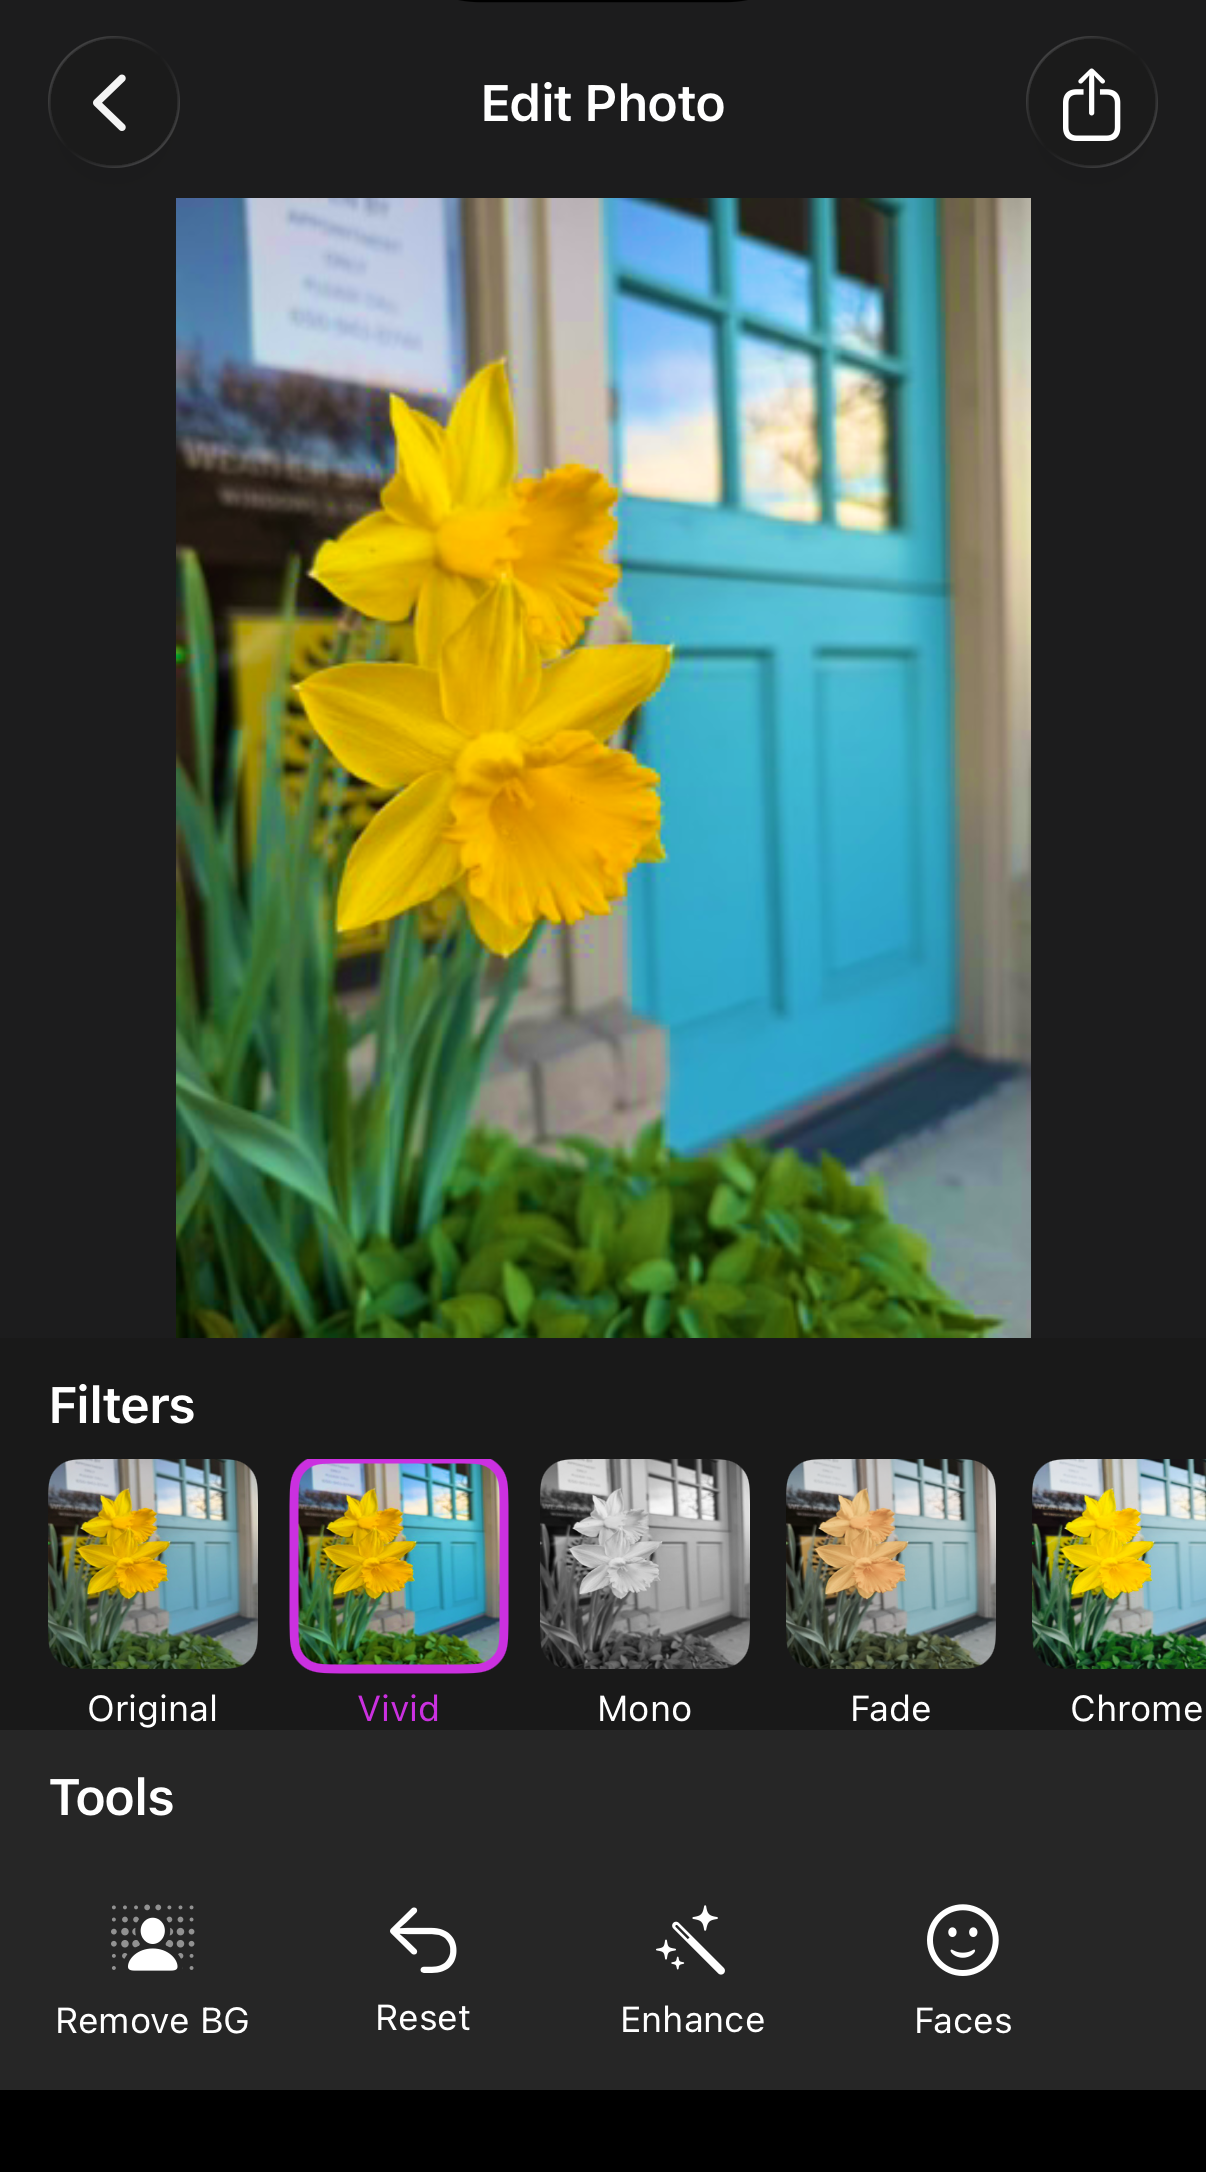
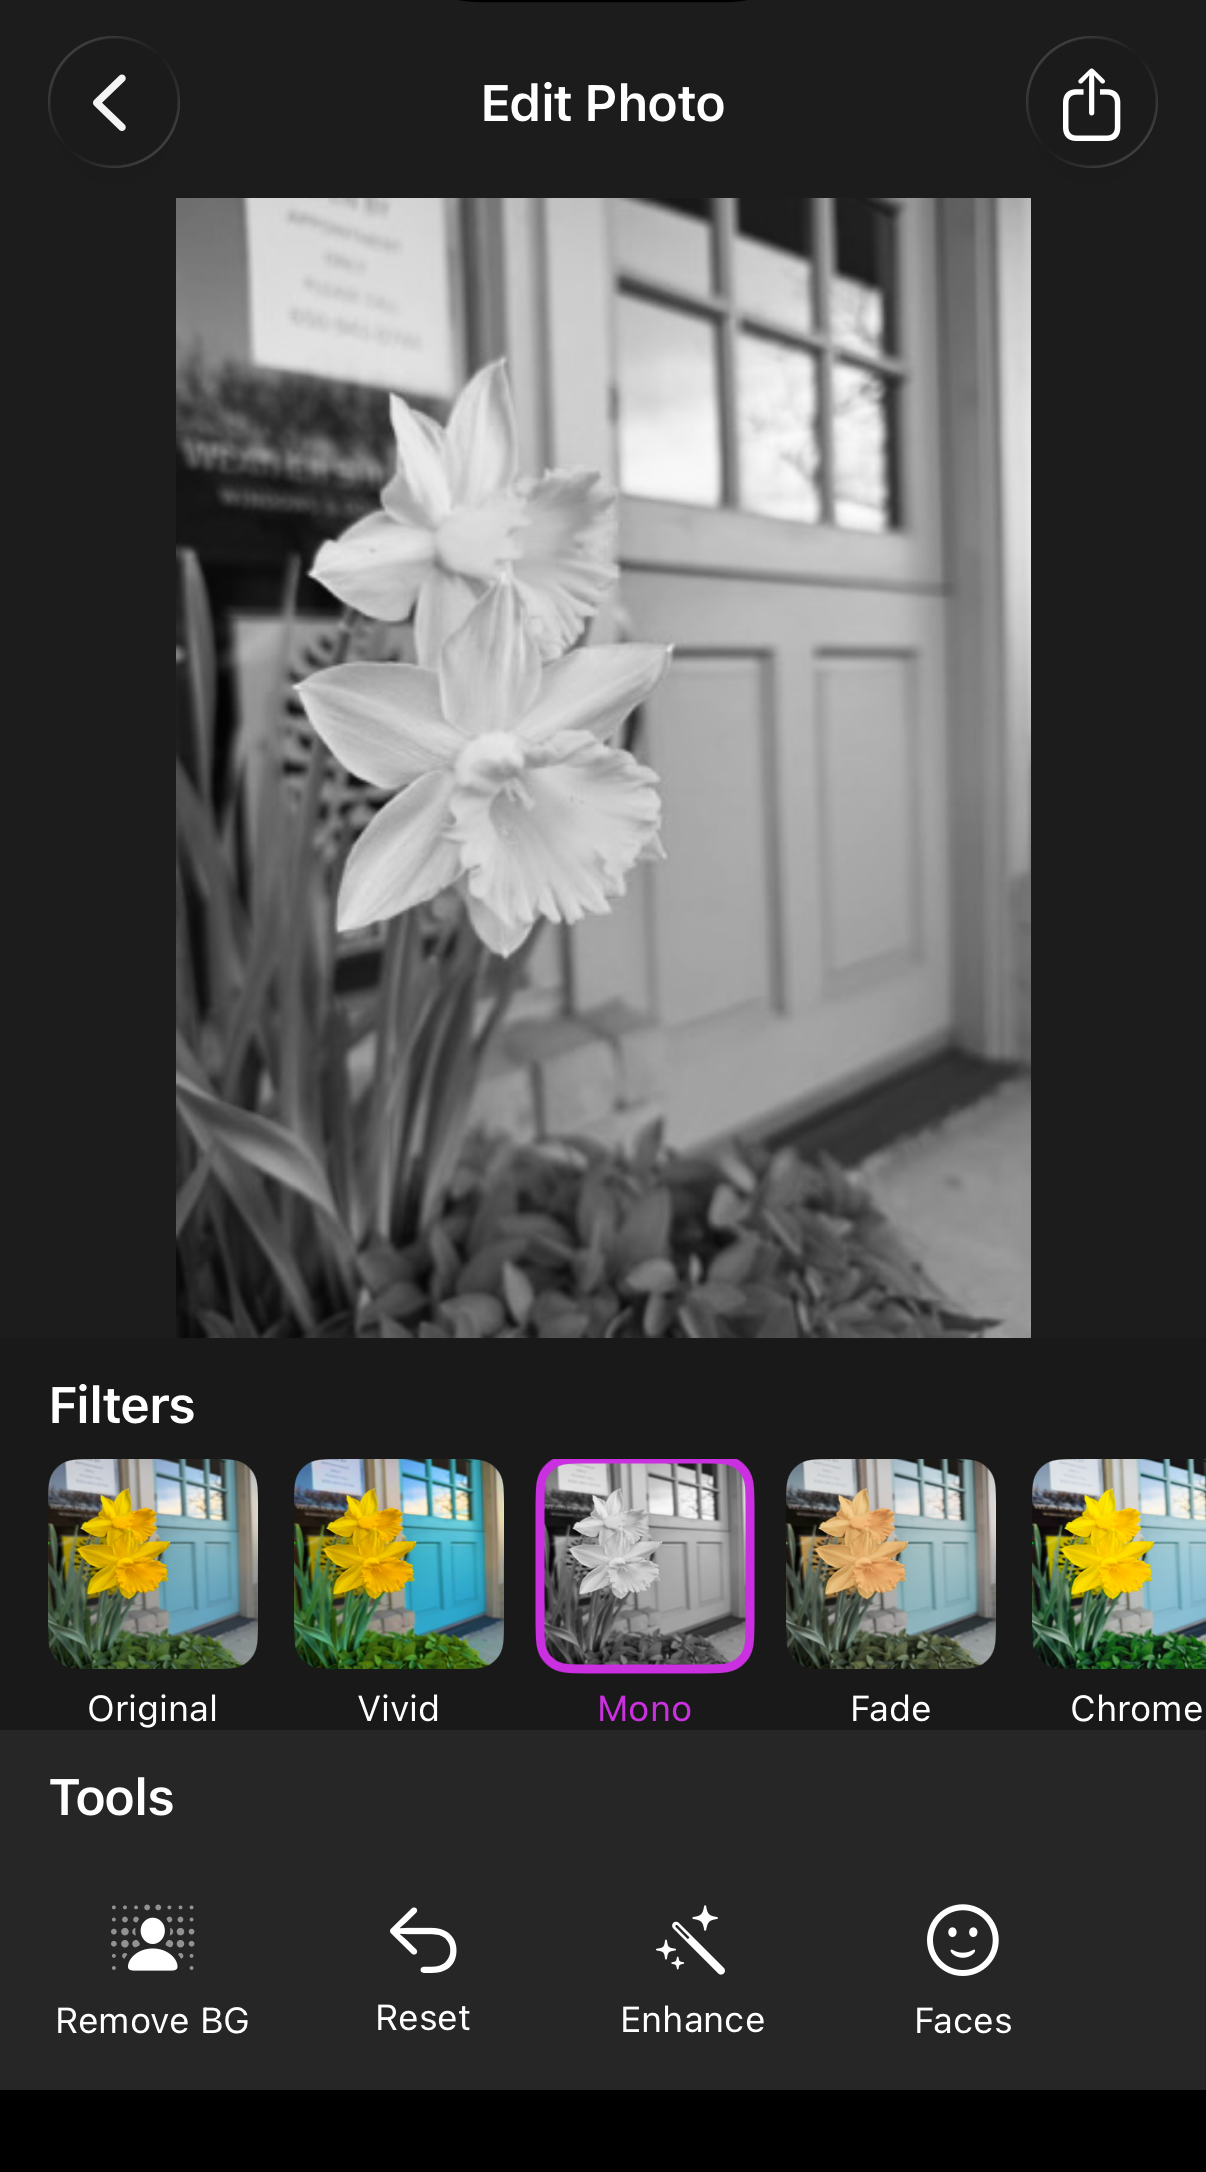
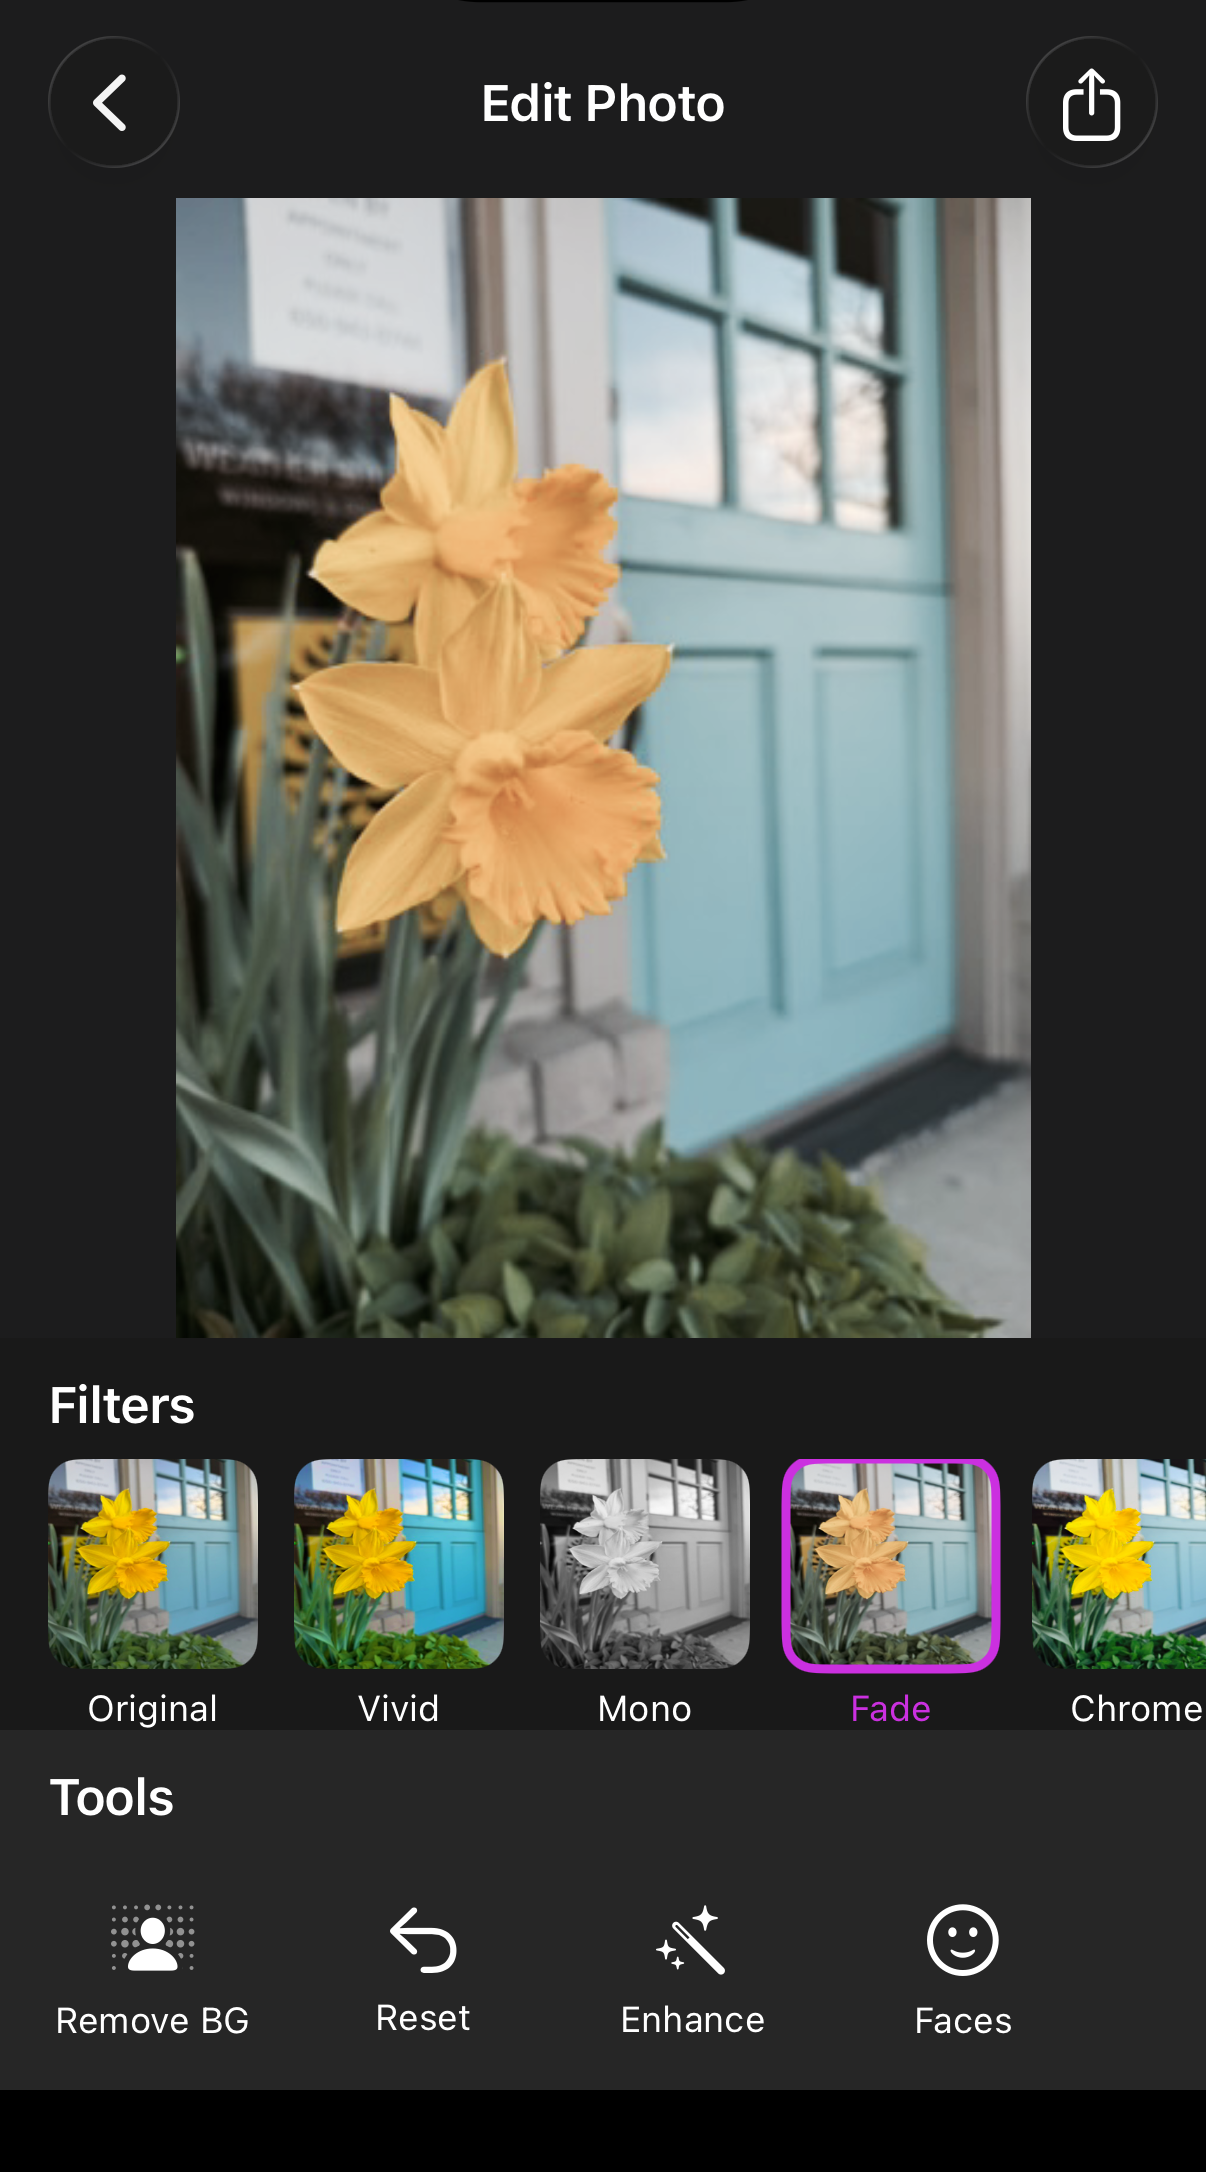
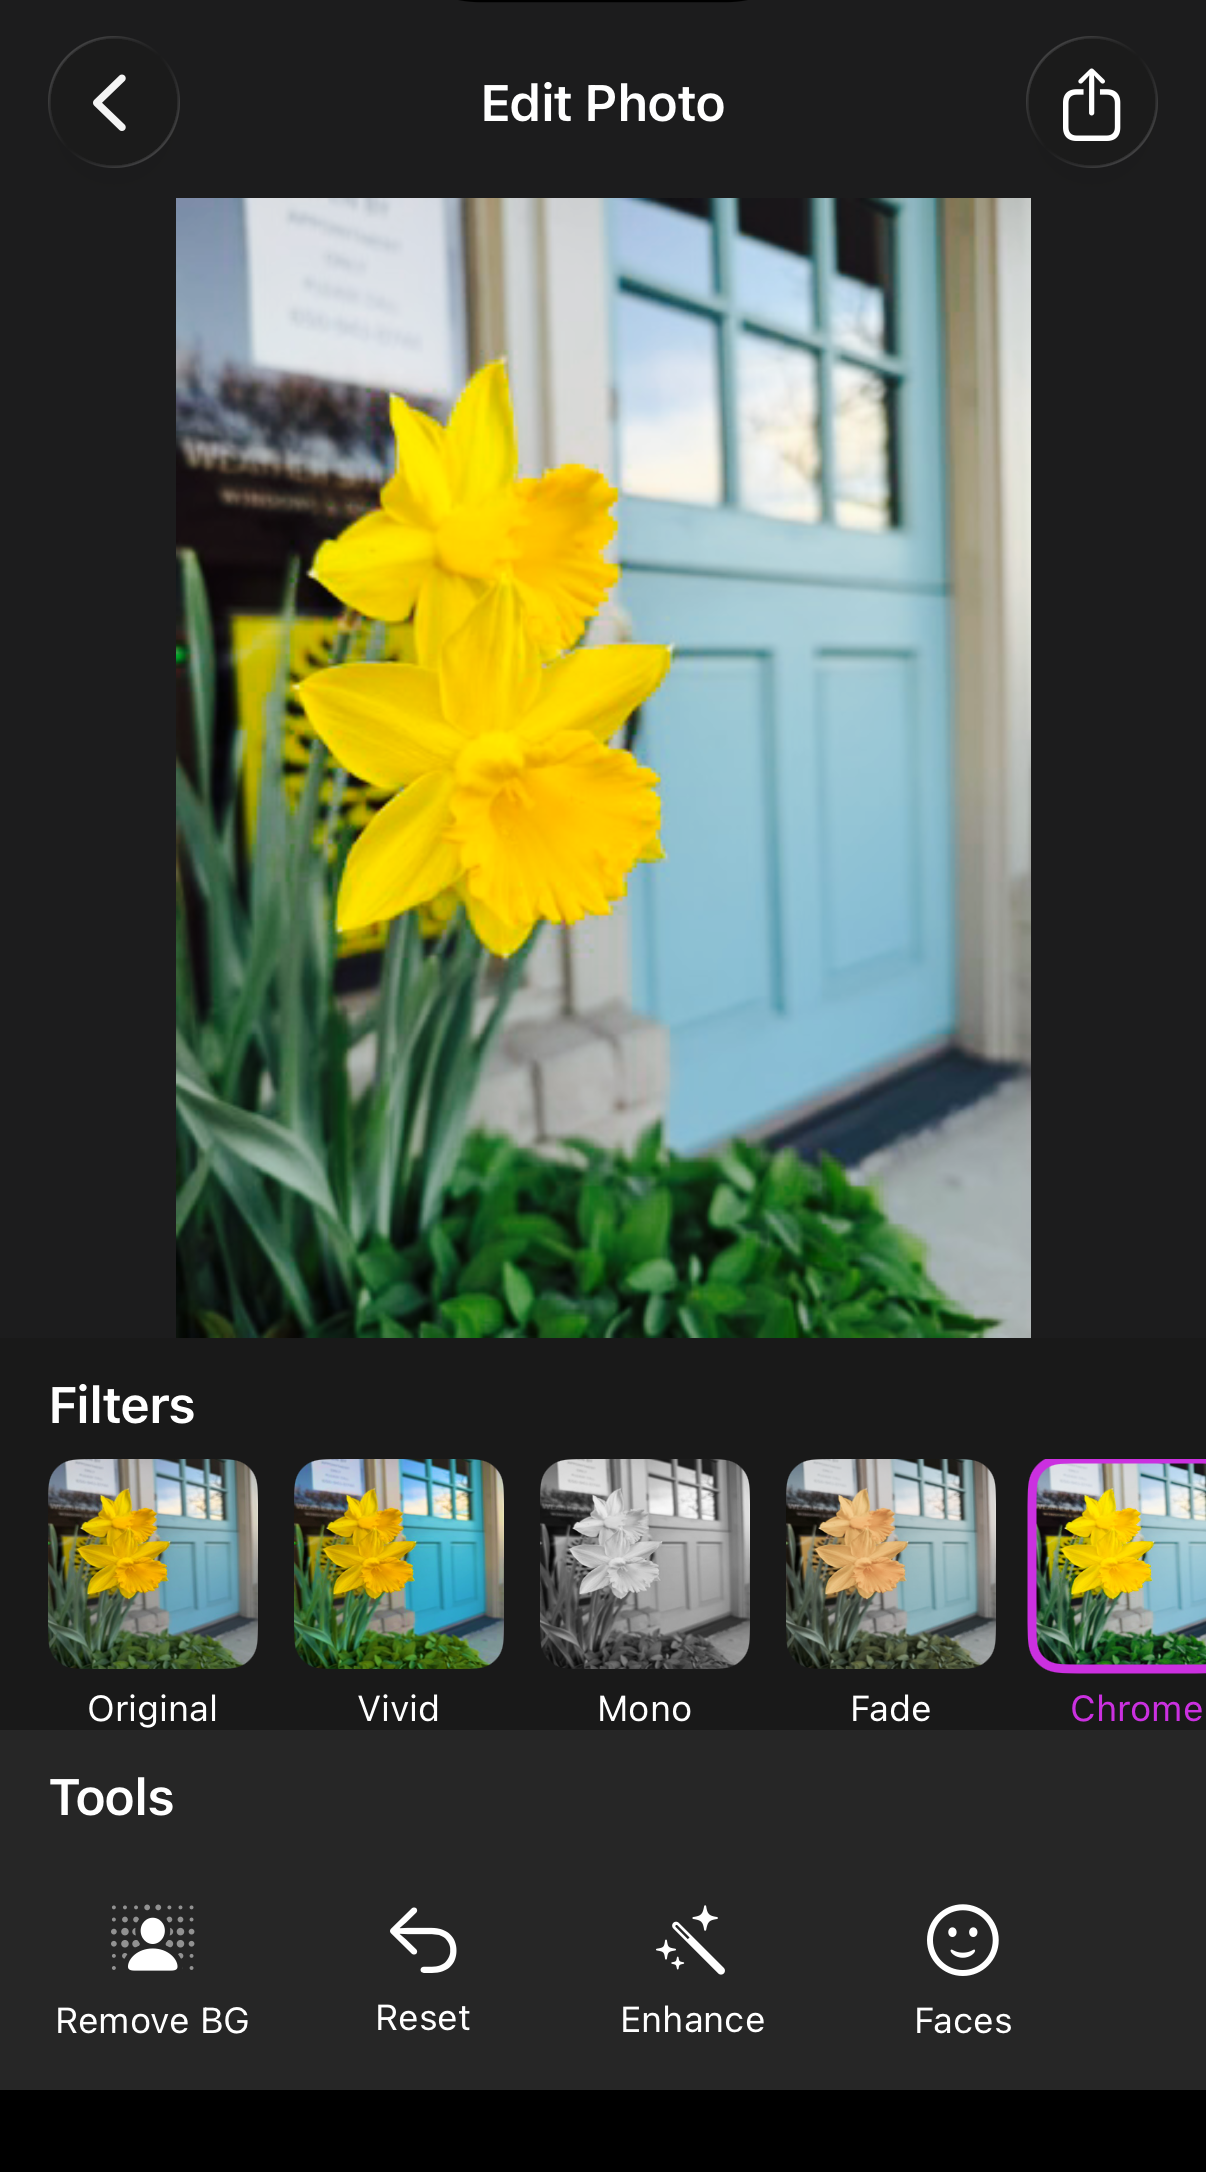
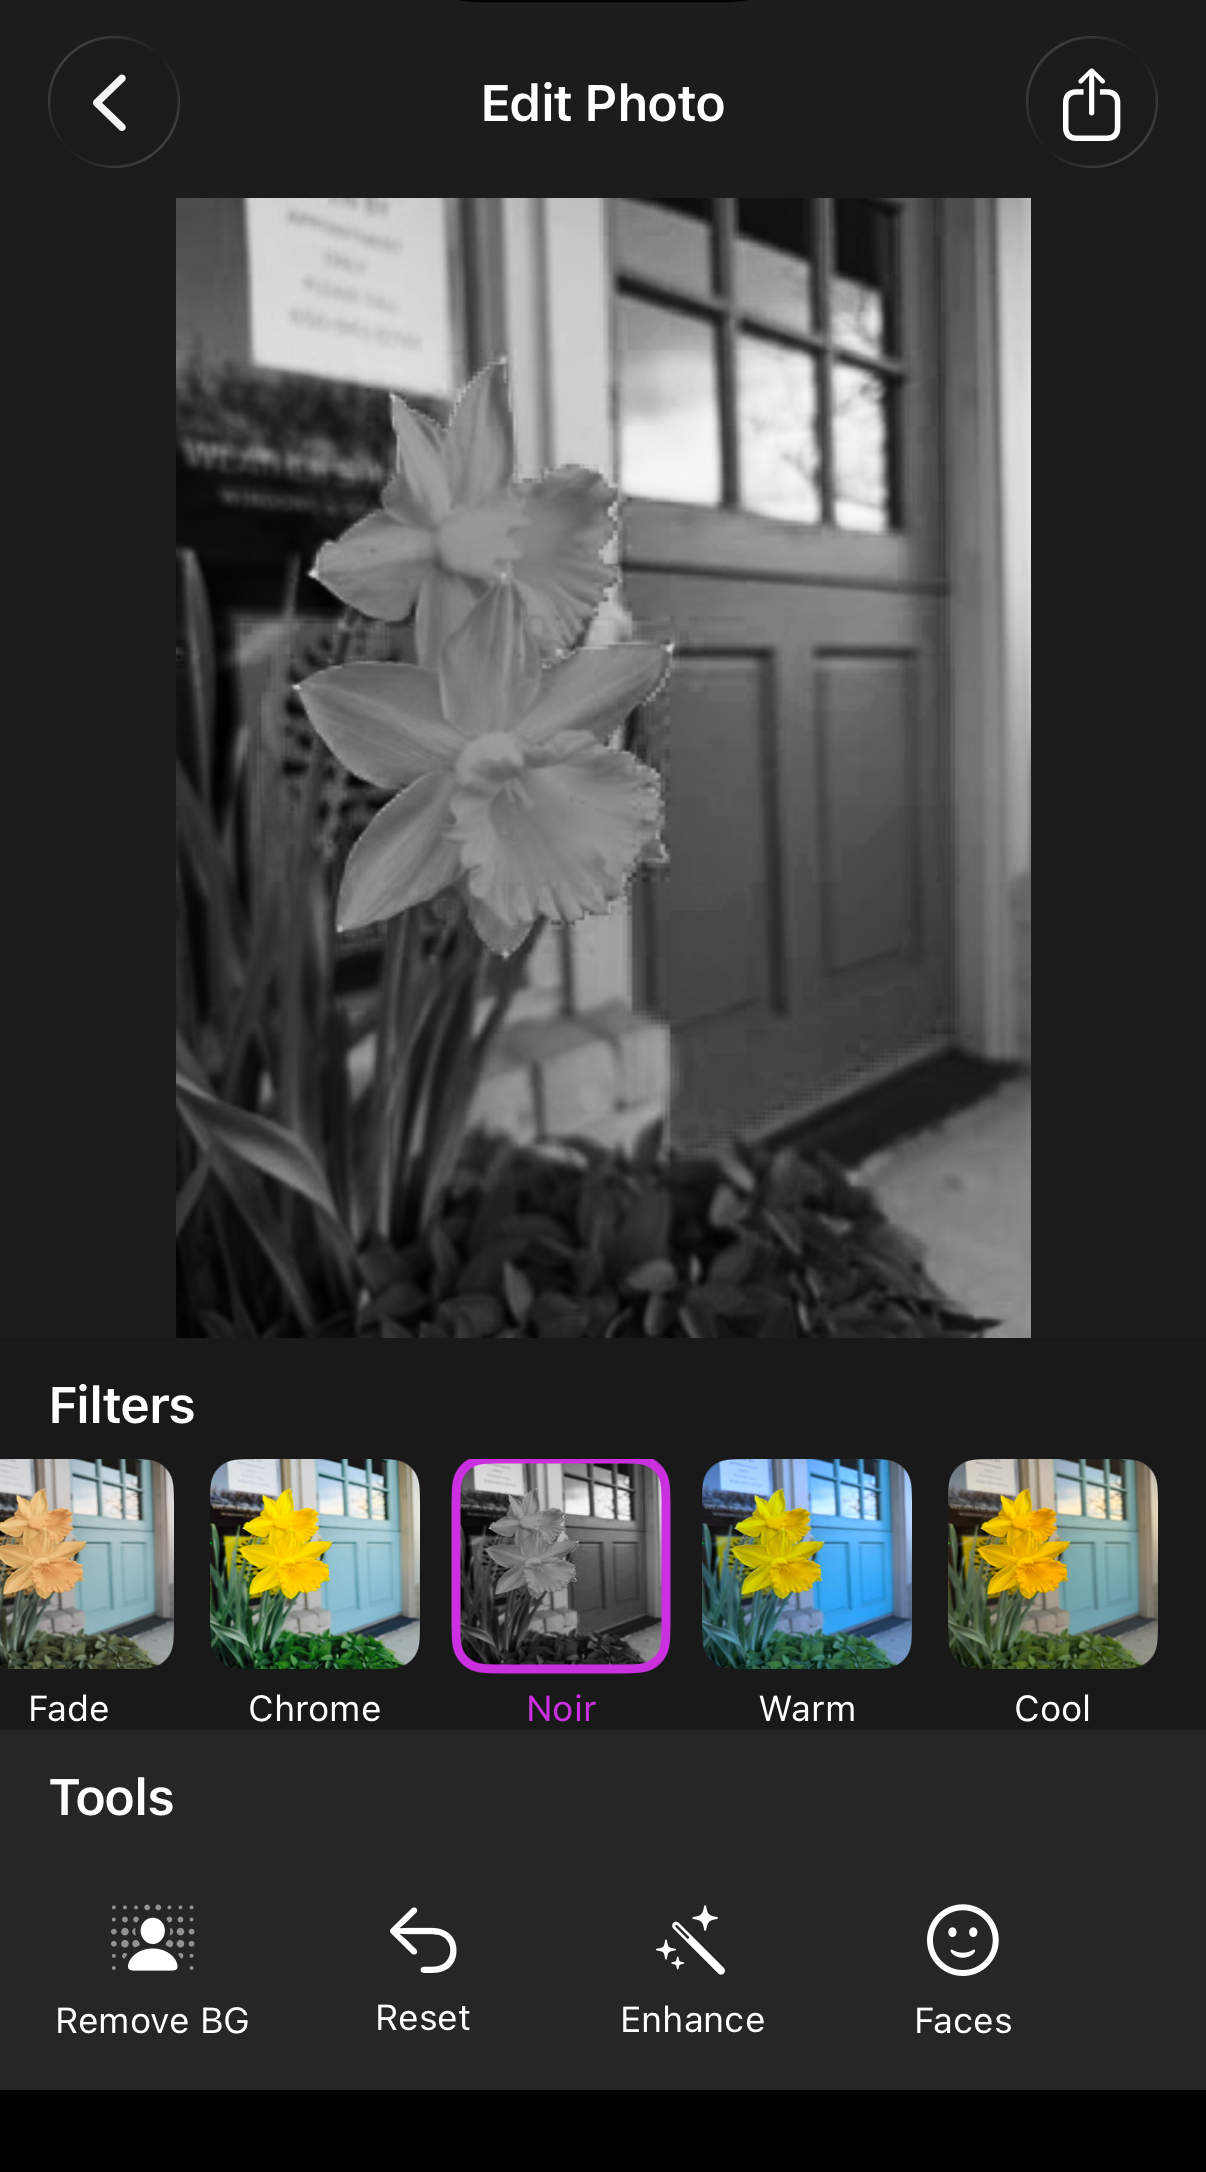
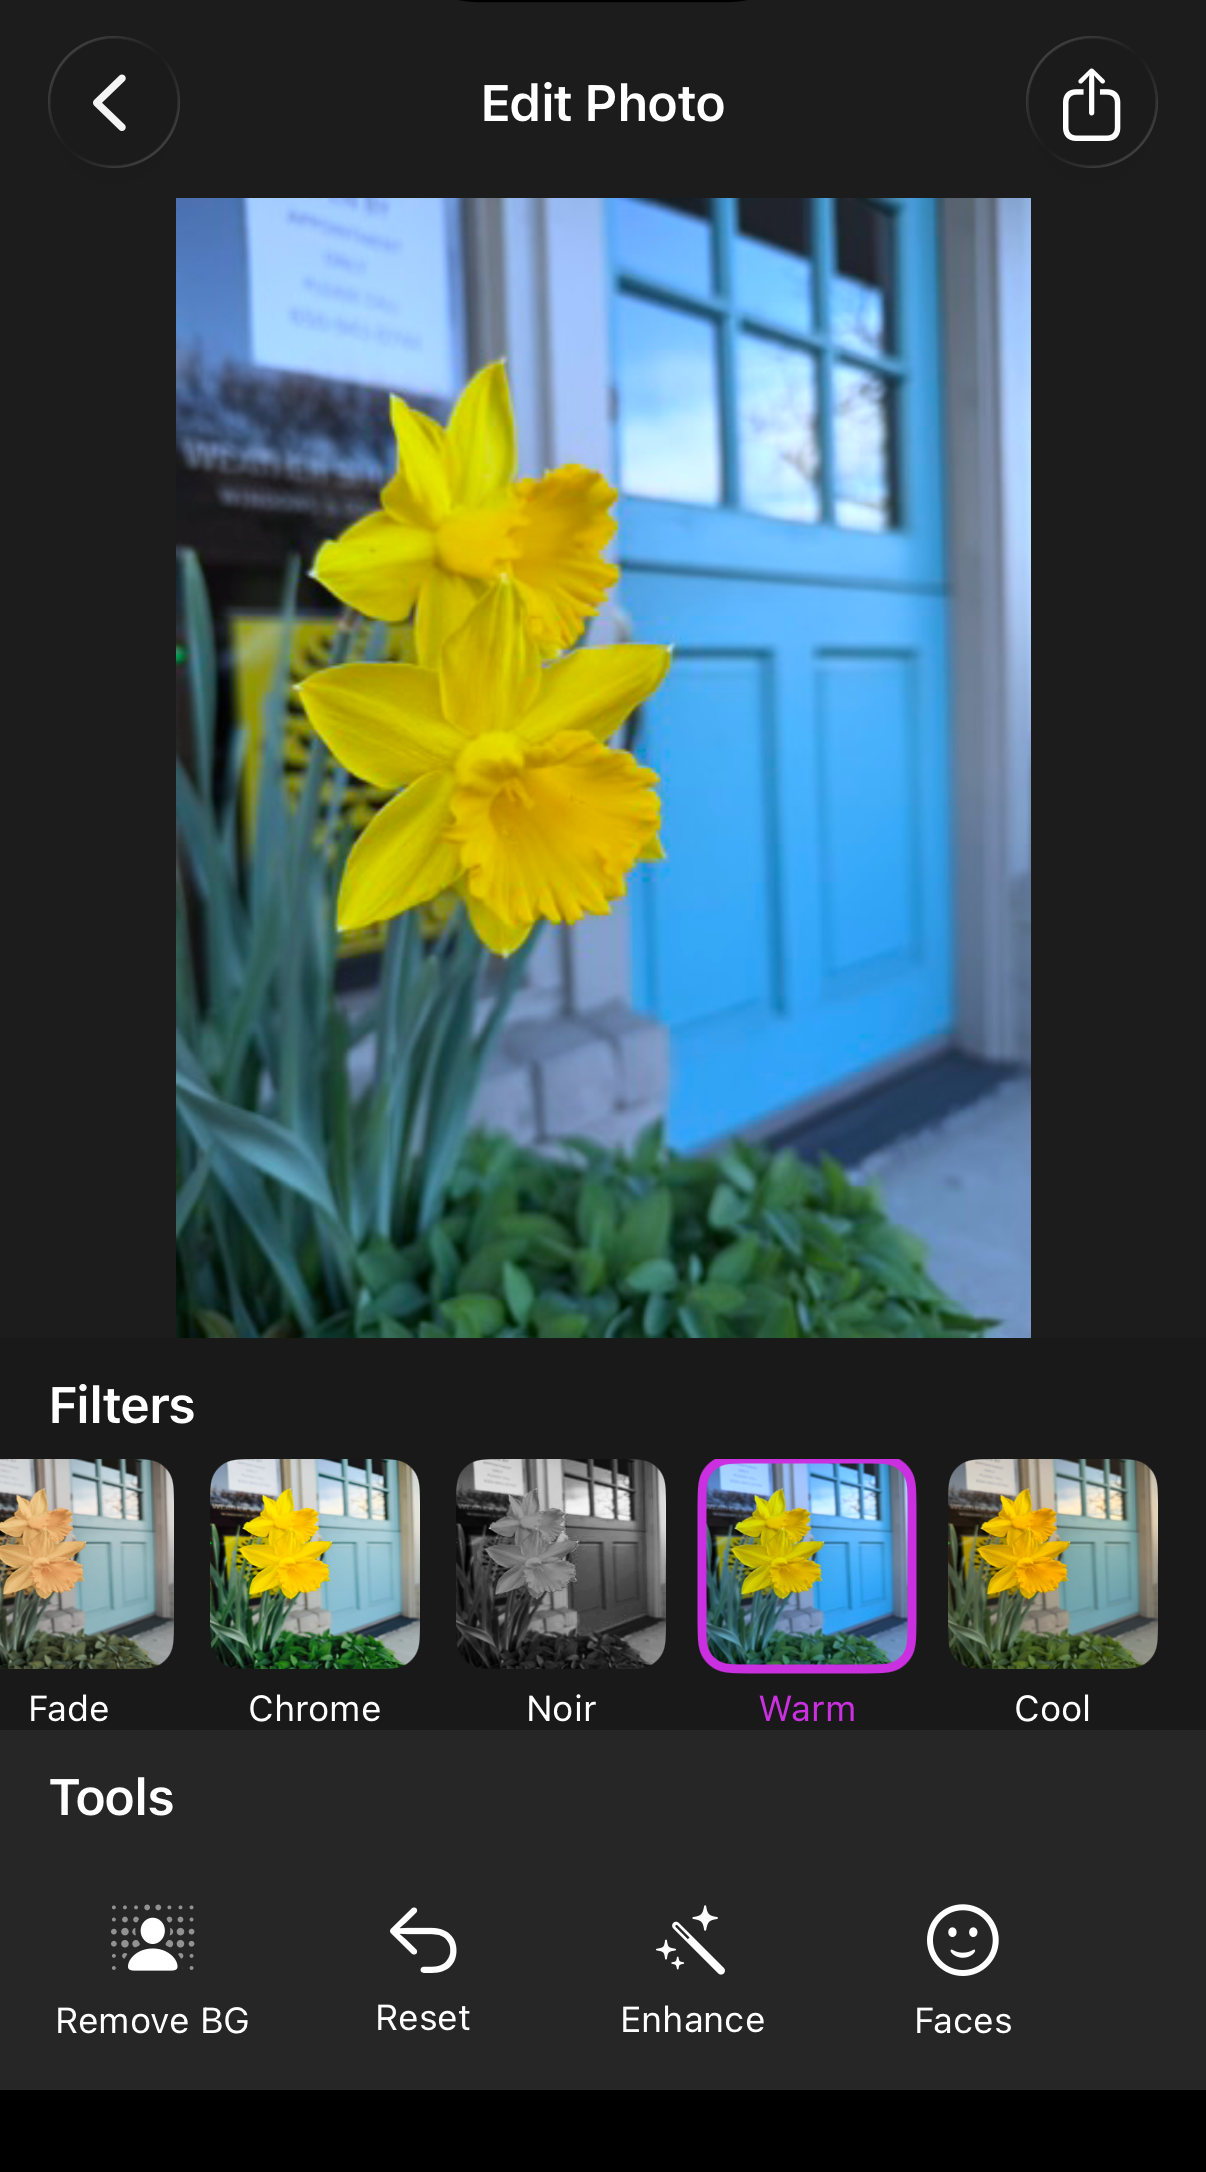
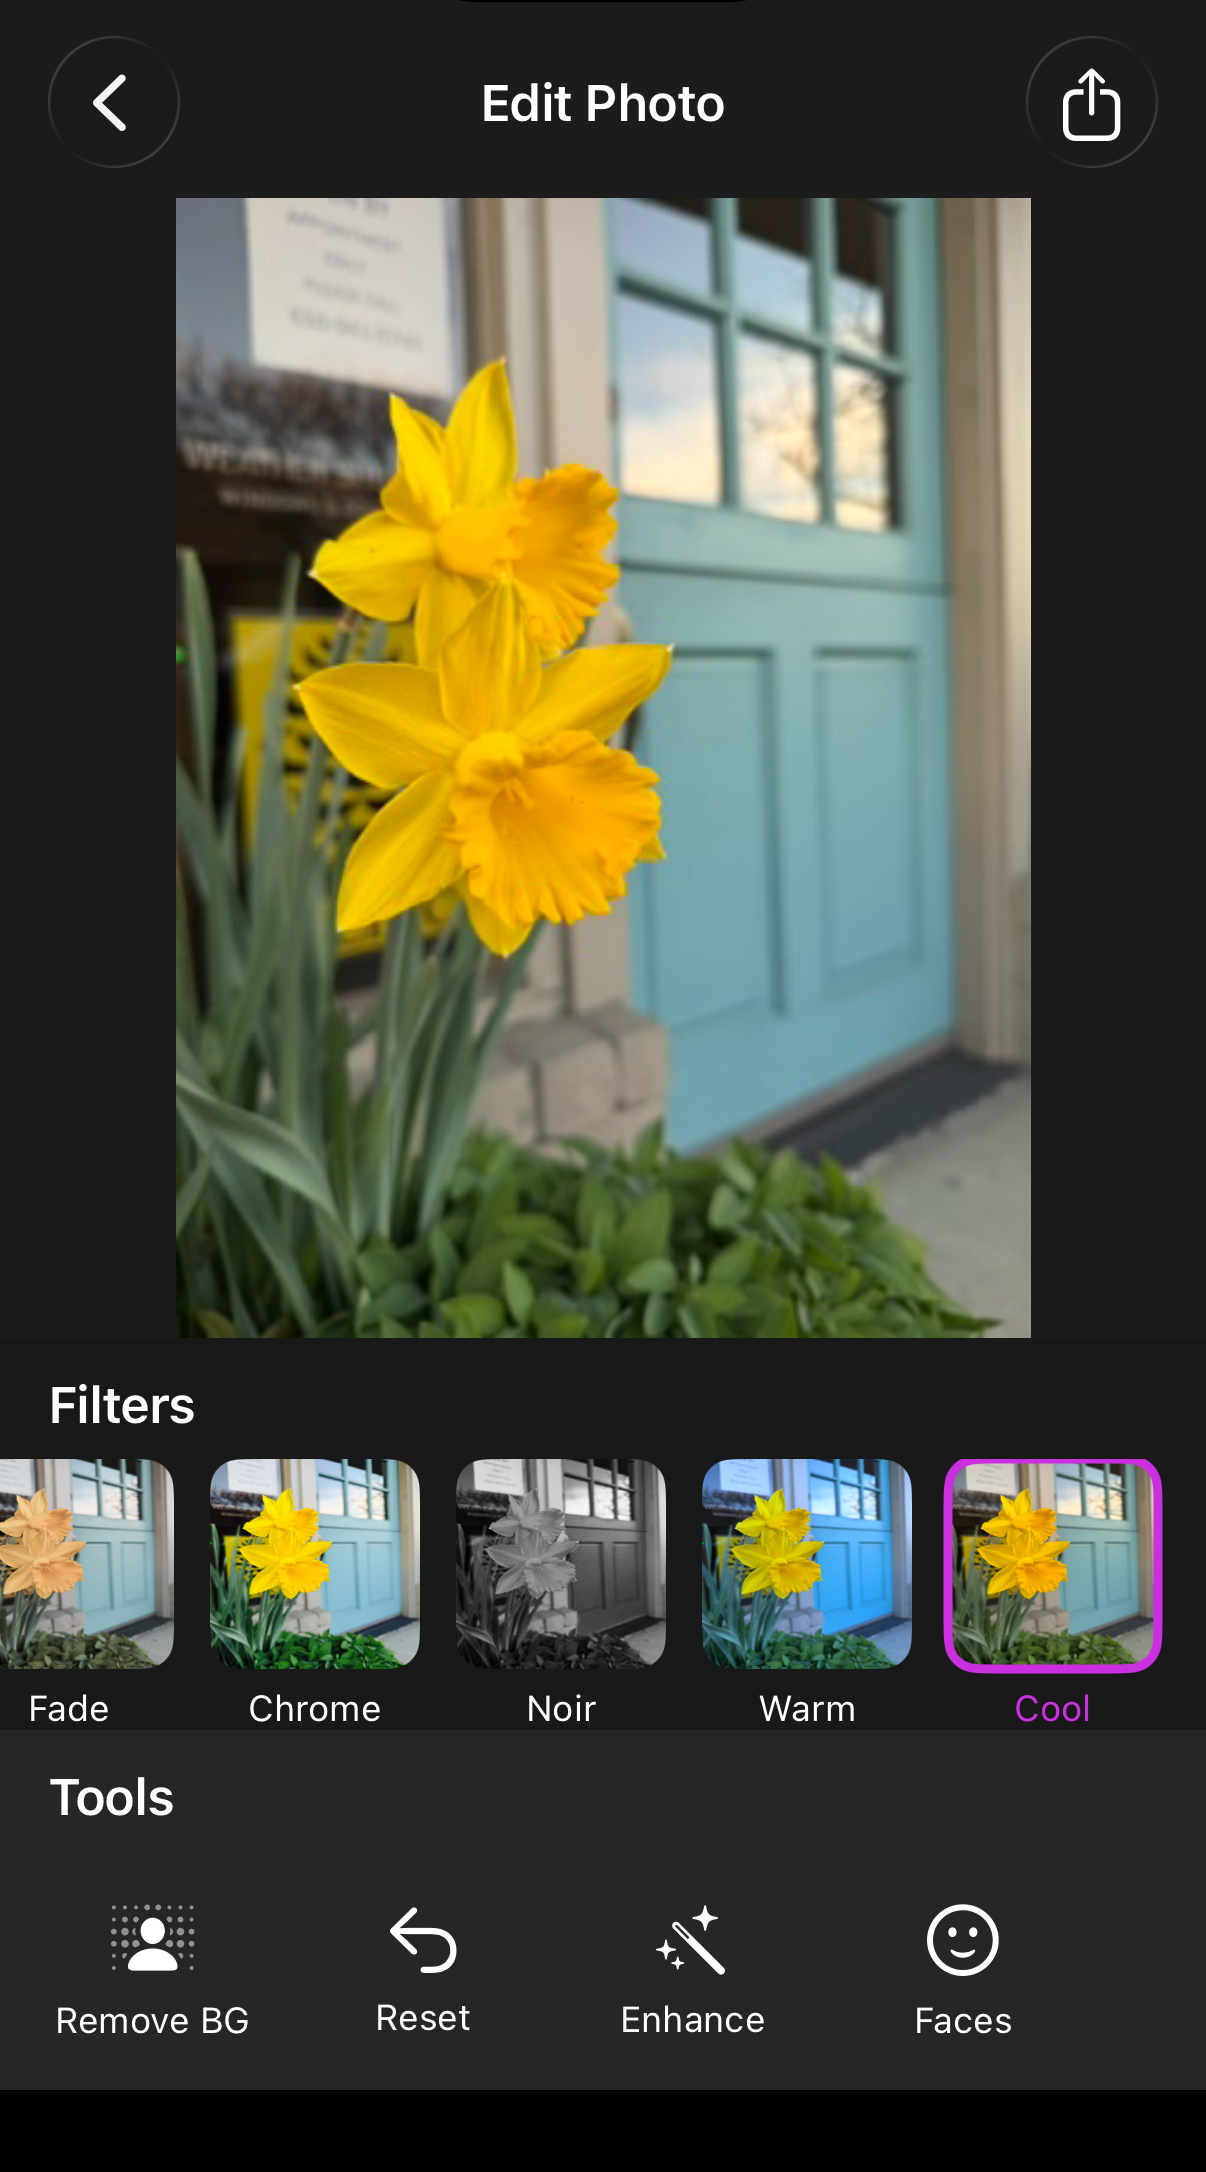
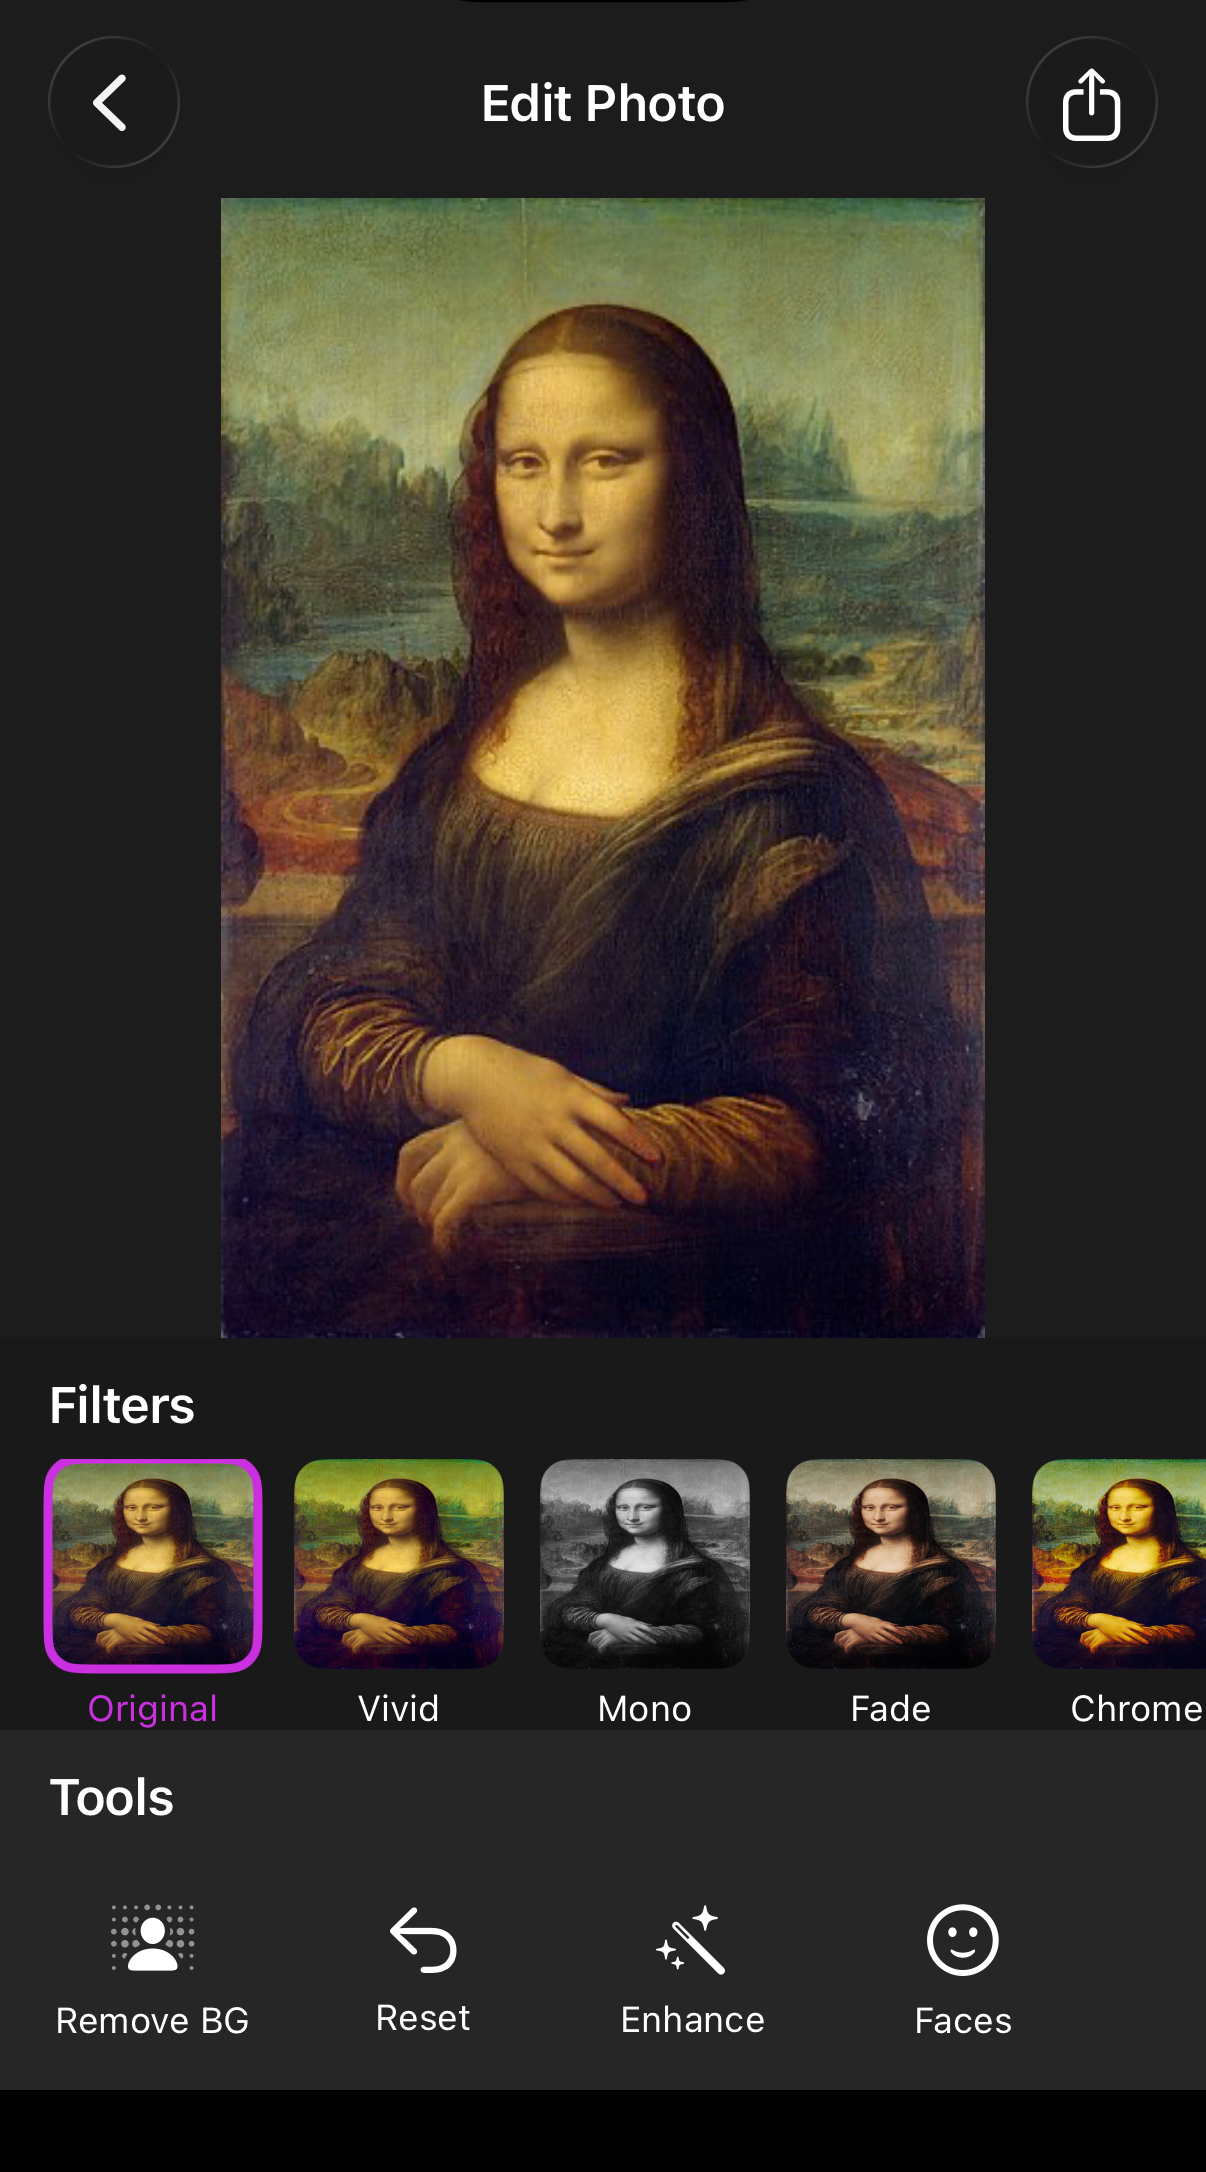
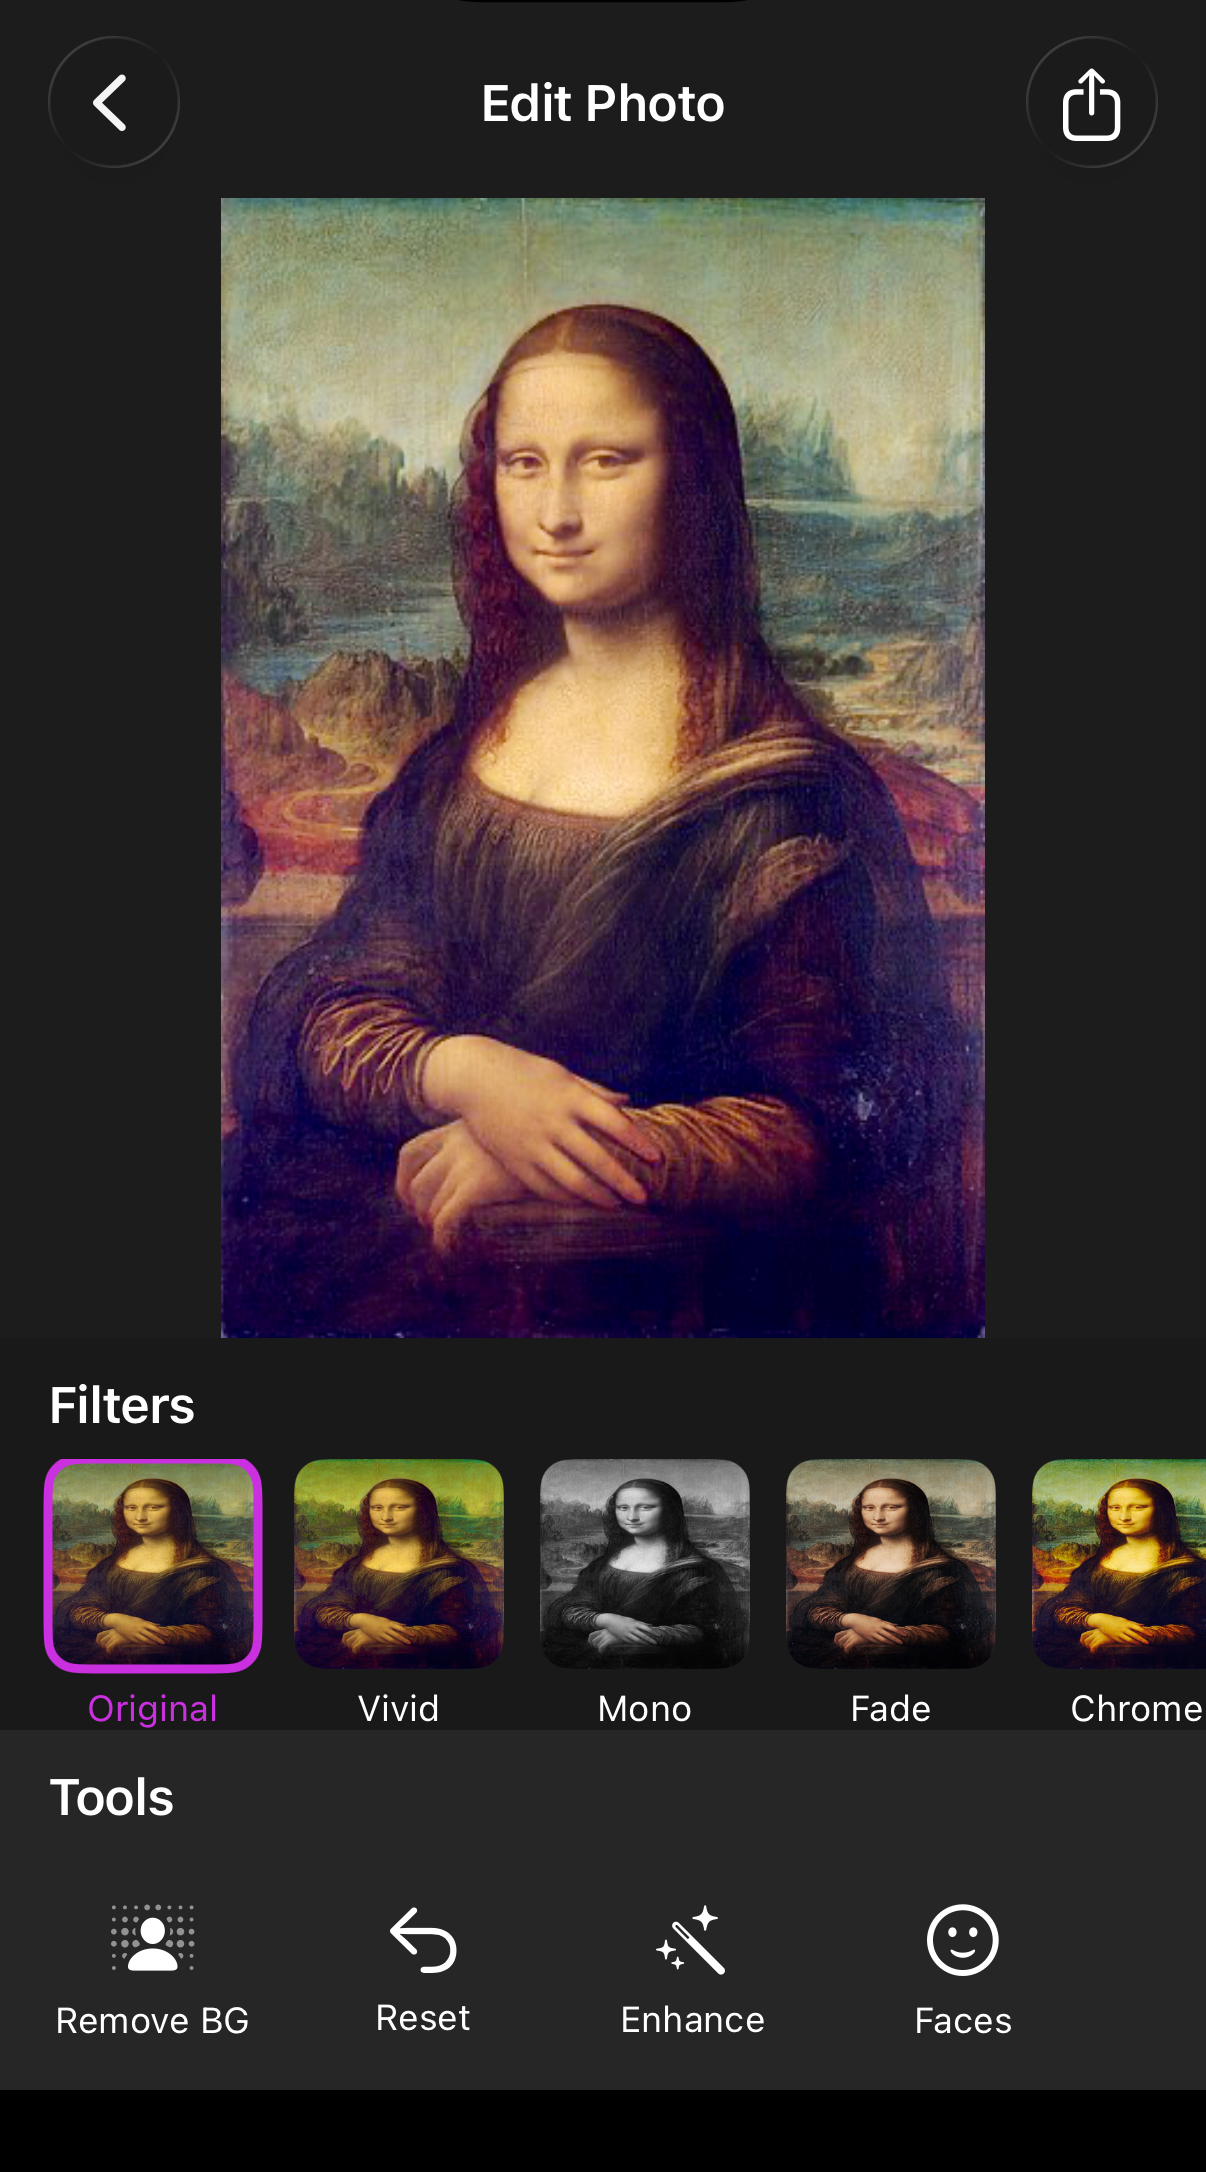
- Photo Filters — 8 presets (Original, Vivid, Mono, Fade, Chrome, Noir, Warm, Cool) applied with Core Image
- Auto Enhance — automatically adjusts exposure, contrast, saturation, and white balance
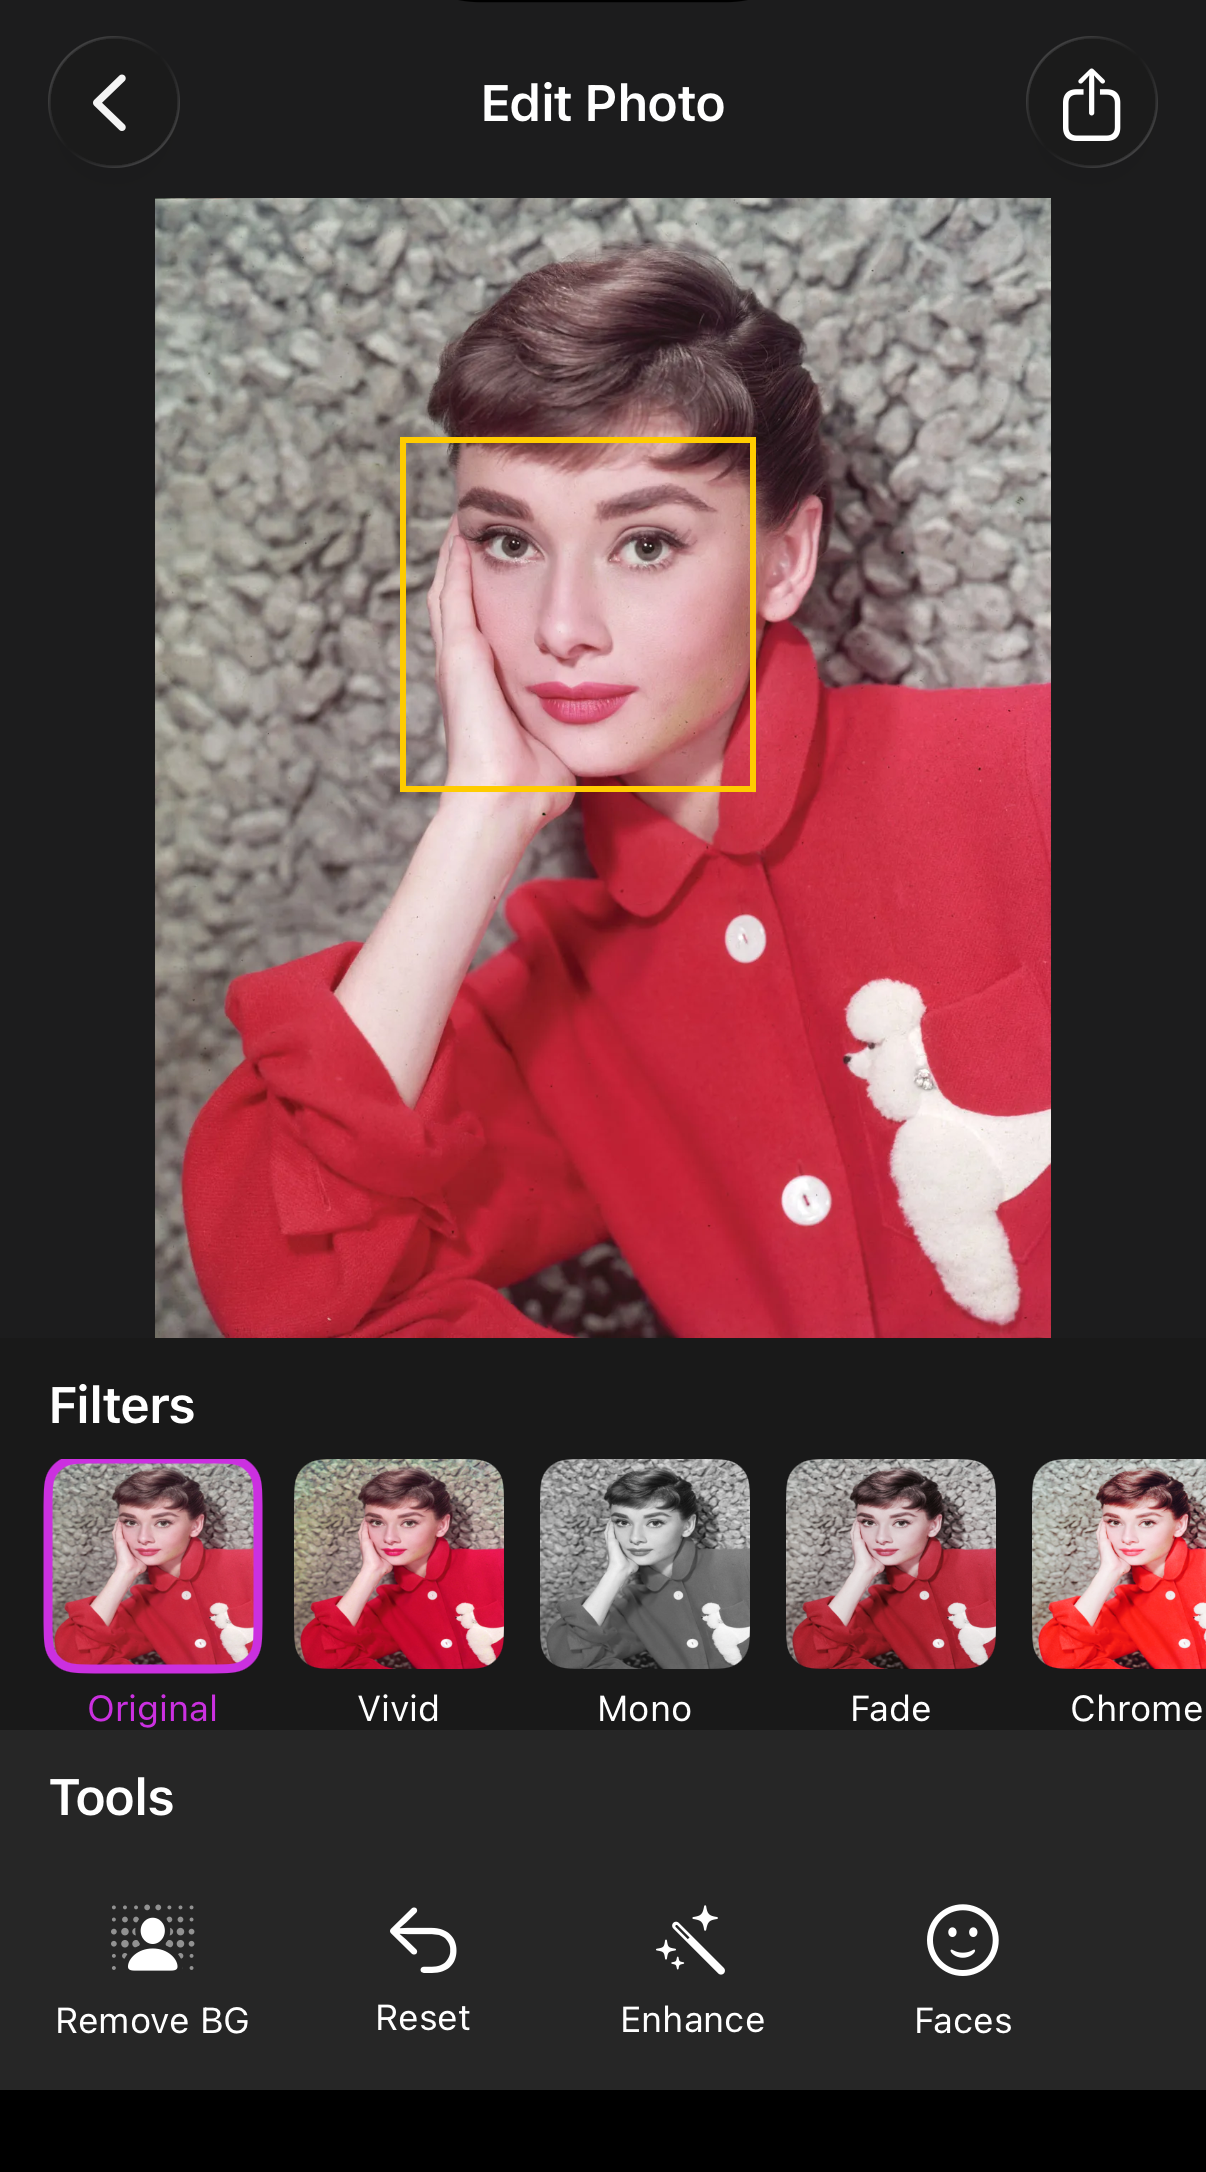
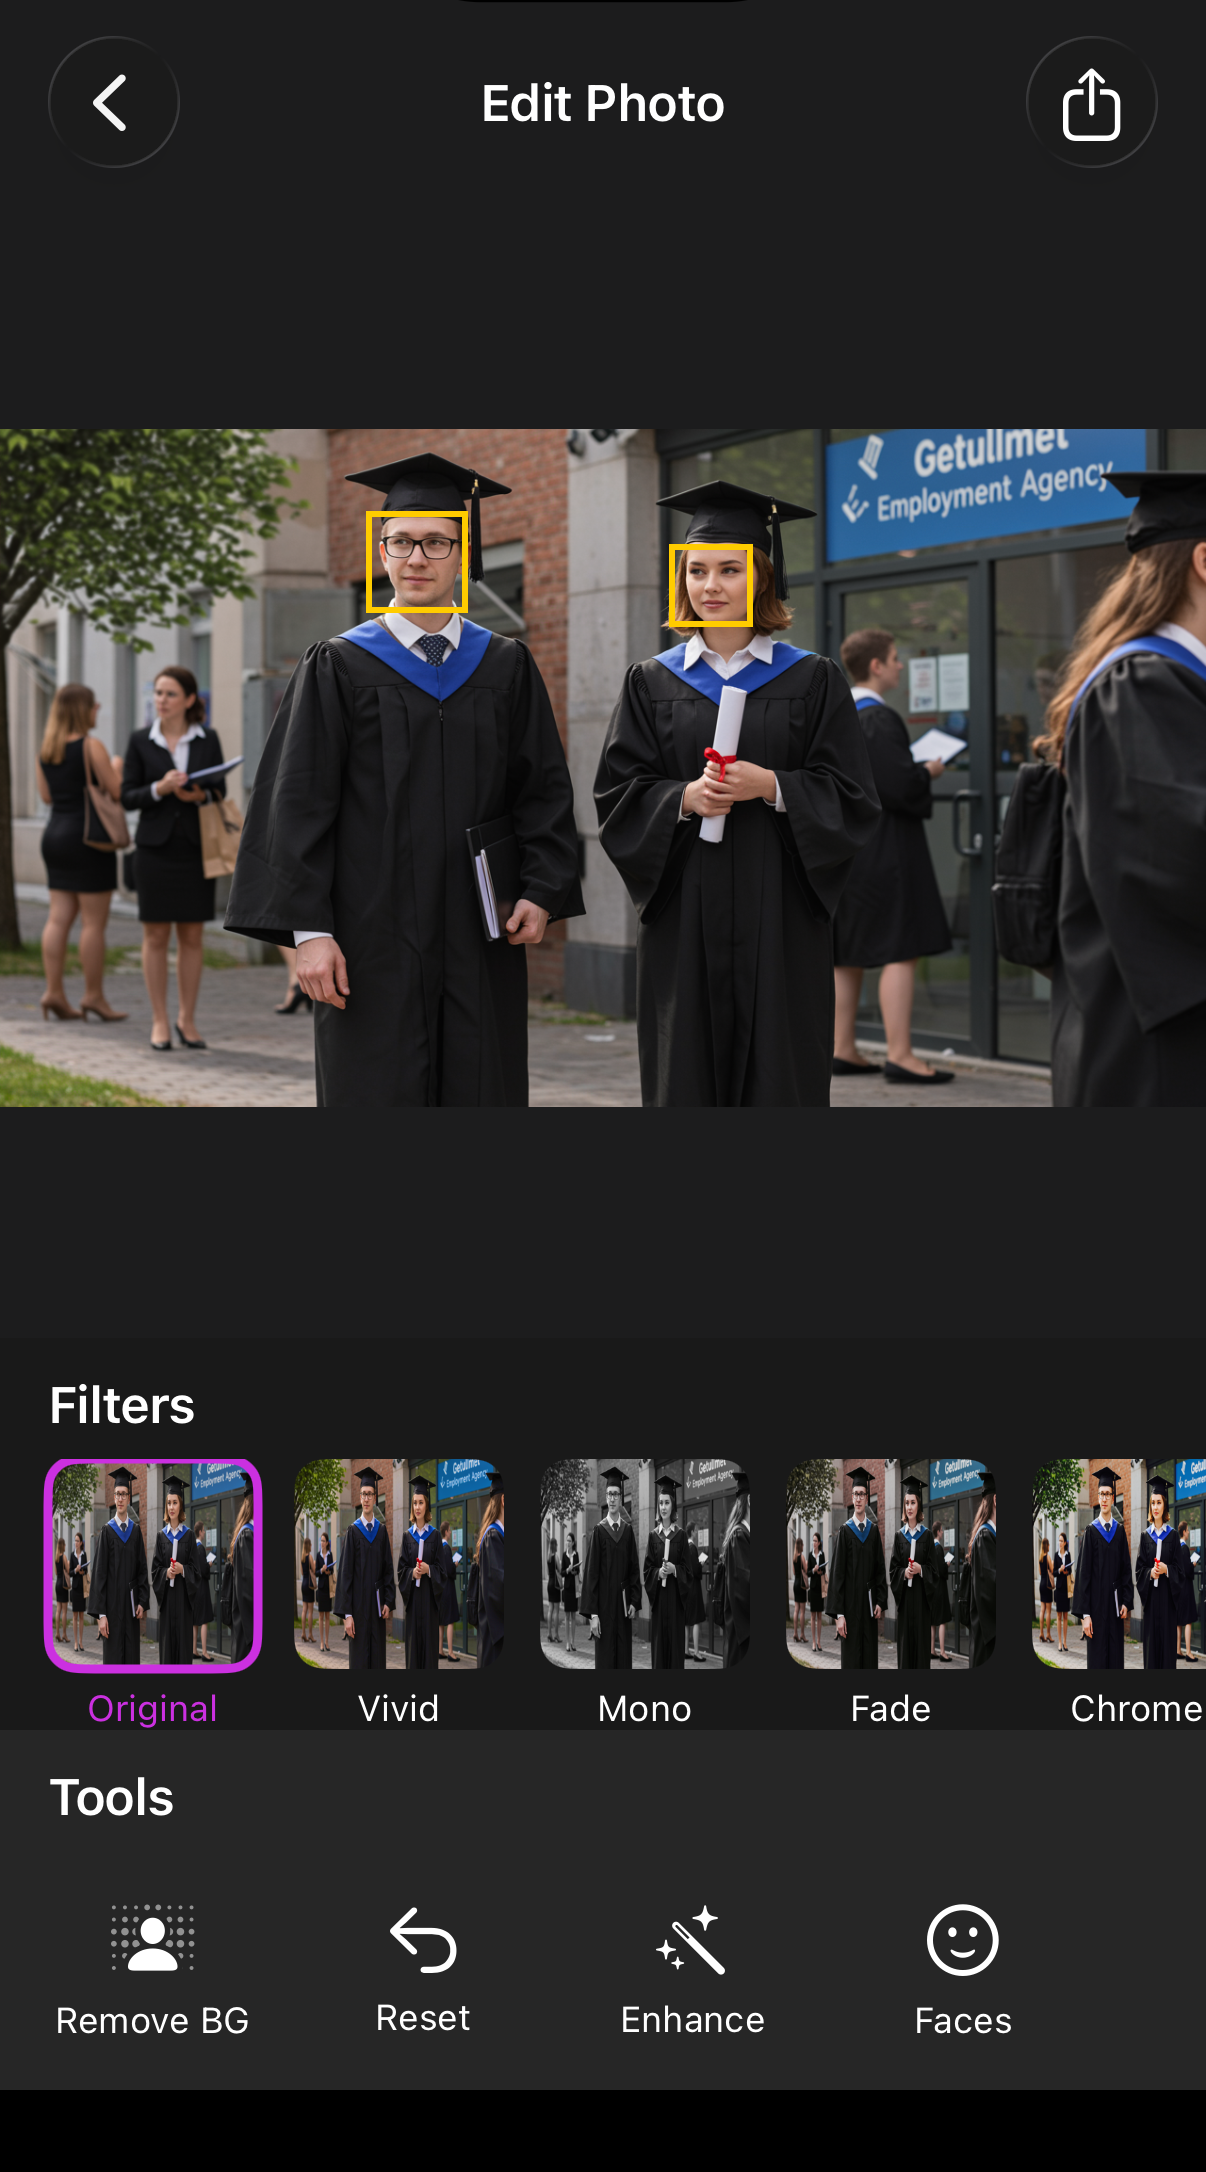
- Face Detection — detects and highlights faces with bounding boxes using
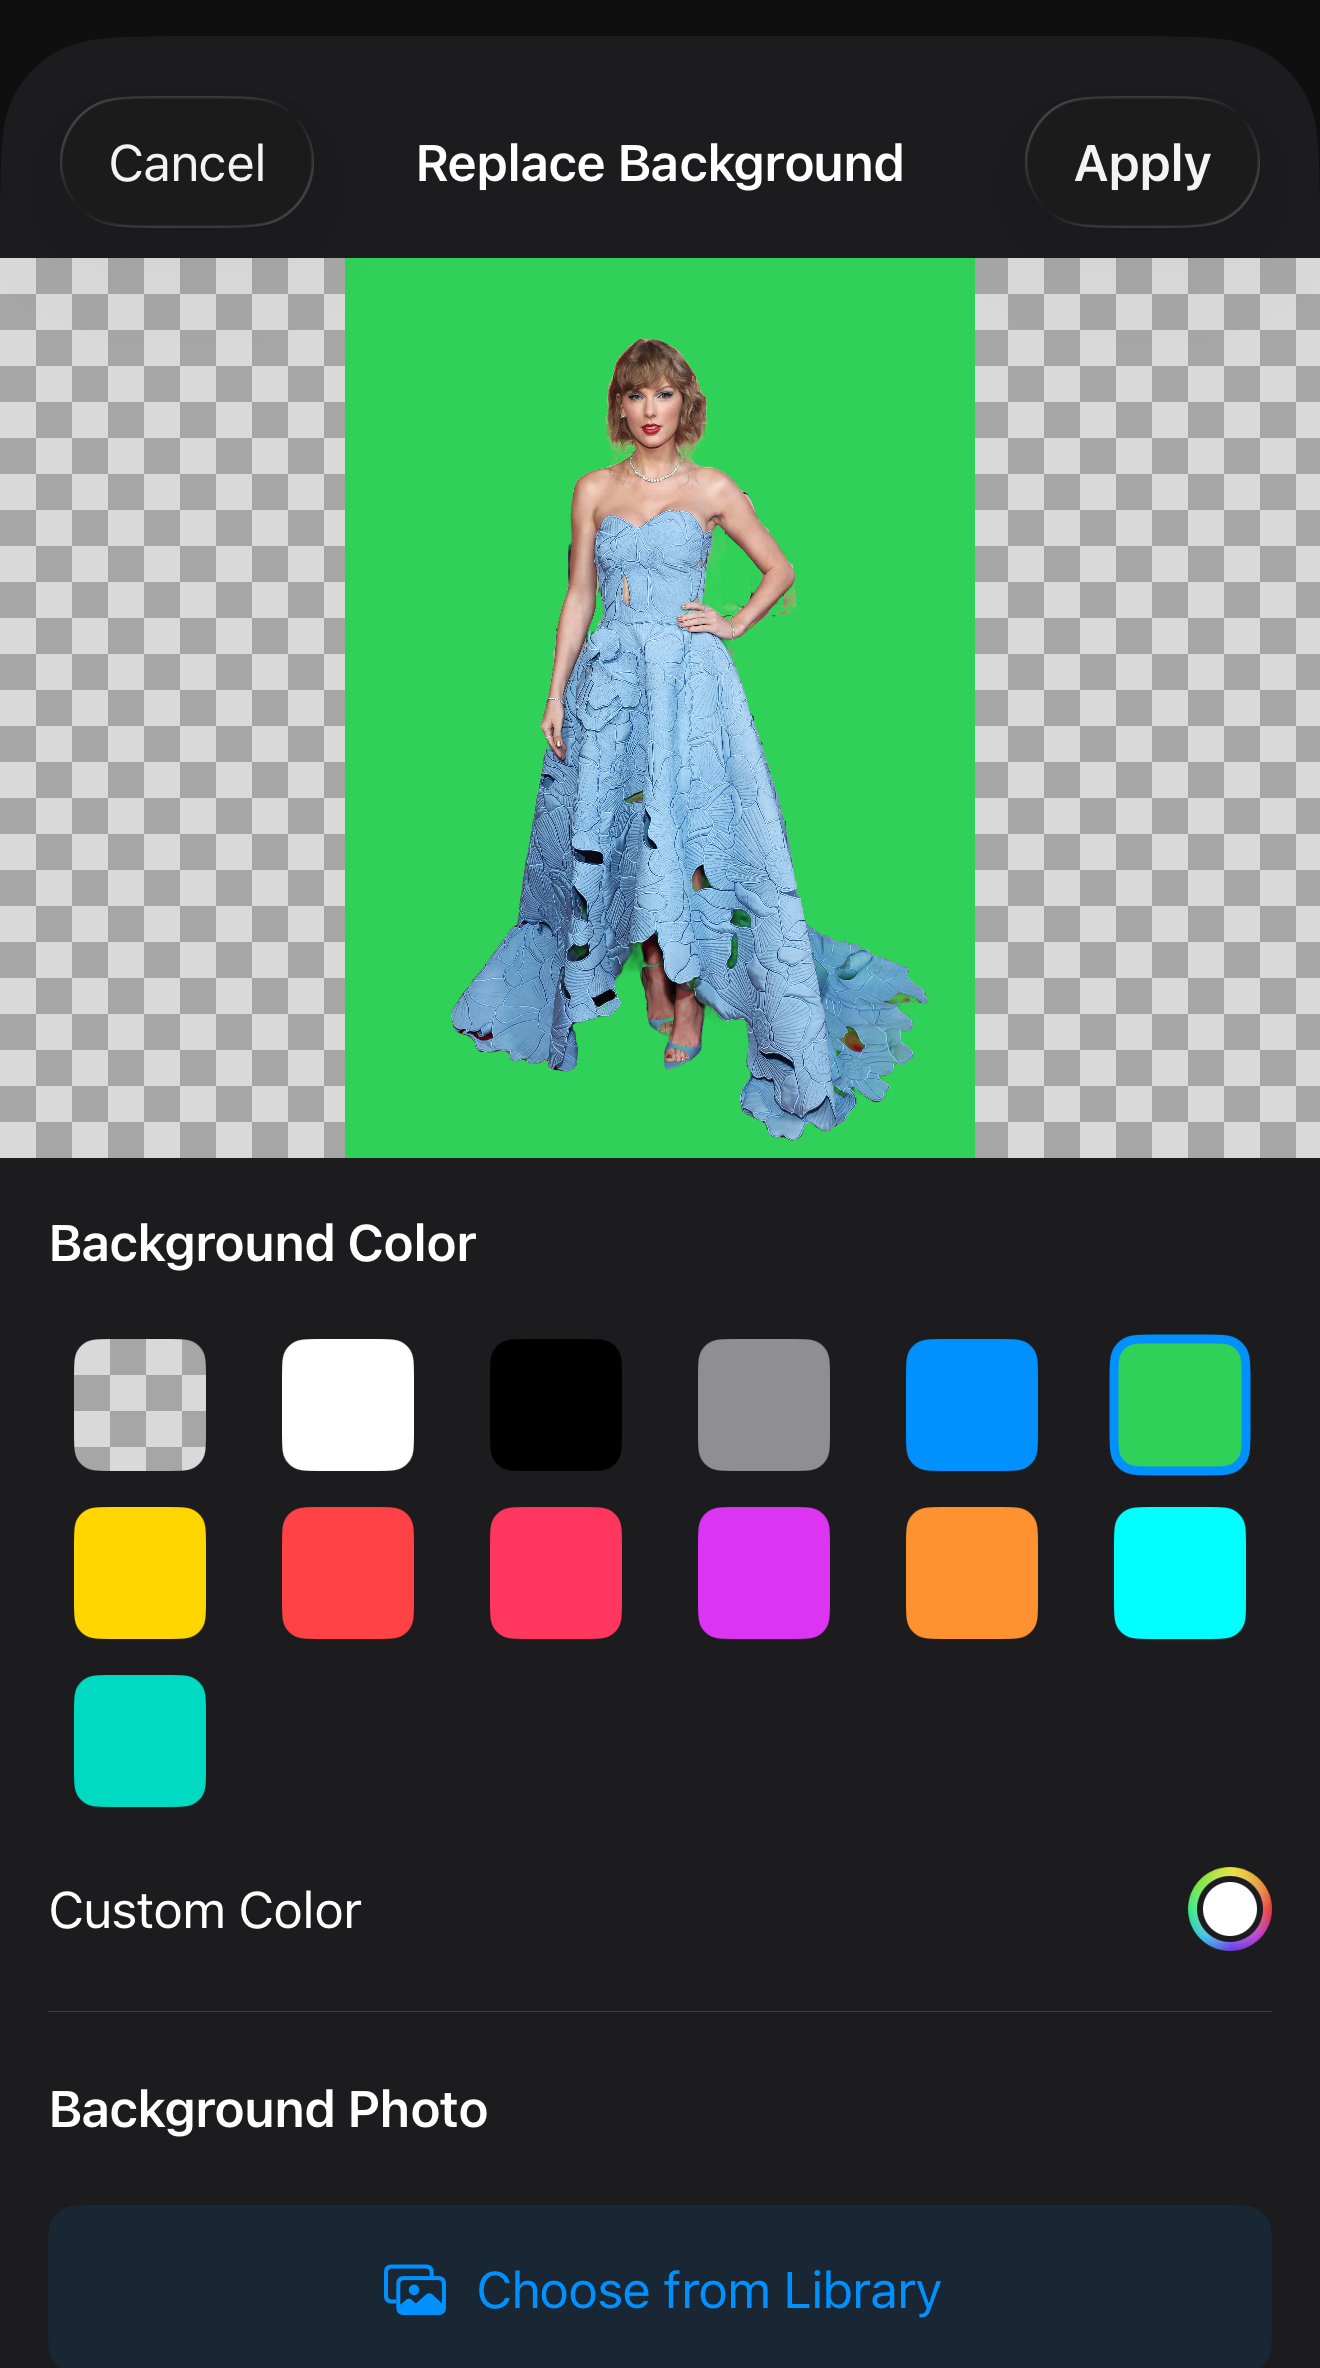
CIDetector - Background Removal & Replacement — removes the background from photos containing a person using Vision’s segmentation model, then lets you replace it with a color or a photo from your library
- Export & Share — save or share edited photos via the native share sheet
Motivation
Photo editing is a concrete, visual domain — you apply a filter, detect a face, remove a background, and see the result immediately on your phone. That directness made it a natural starting point for exploring computer vision on iOS. The background replacement feature in particular pushed me to understand how segmentation masks work, how Core Image compositing works, and how the two connect — which turned out to be the most valuable part of building this.
Technologies
| Technology | Used For |
|---|---|
| PhotosUI | Photo library access |
| SwiftUI | UI framework |
| Core Image | Filters, auto enhancement, face detection |
| Vision | Person segmentation, background removal |
Processing Pipeline
The app is structured as a processing pipeline:
Input (PhotosUI)
  → Filters: CIFilter chain per preset
  → Auto Enhance: CIImage.autoAdjustmentFilters()
  → Face Detection: CIDetector → coordinate mapping → SwiftUI overlay
  → Background Removal: computeMask [slow, once] → applyBackground [fast, repeated]
Output (SwiftUI live preview → Share sheet)
The key architectural decision is the two-step separation in background removal. computeMask runs Vision’s segmentation model on the Neural Engine — expensive, done once. applyBackground composites the person over a new background using Core Image — inexpensive, runs on every selection change for the live preview. Keeping them separate makes the UI feel immediate without repeating the costly inference work.
Filters with Core Image
Each filter preset maps to one or more CIFilter instances chained together — “Warm” bumps the temperature with CITemperatureAndTint, “Vivid” boosts saturation and contrast, and so on. Filter thumbnails in the strip are generated asynchronously on a background thread so the UI stays responsive while loading.
Auto Enhance
CIImage.autoAdjustmentFilters() analyzes the image and returns a set of suggested correction filters. Apply them in sequence and you get noticeably improved exposure, balanced whites, and richer colors — with only a few lines of code.
Face Detection
CIDetector with type CIDetectorTypeFace returns CIFaceFeature objects, each with a bounds in Core Image coordinates (origin at bottom-left). The tricky part is converting those to SwiftUI’s coordinate space (origin at top-left) and scaling them to match the scaledToFit image view.
Background Removal & Replacement
Vision’s VNGeneratePersonSegmentationRequest produces a pixel buffer mask — white where the person is, black everywhere else. The person is then composited over the chosen background using CIFilter.blendWithMask().
One detail worth noting: photos taken in portrait mode on iPhone are stored with .imageOrientation == .right. The raw cgImage doesn’t account for this, so Vision would process a sideways image and return a misaligned mask. Normalizing orientation to .up before passing to Vision is required:
extension UIImage {
    func normalizedOrientation() -> UIImage {
        guard imageOrientation != .up else { return self }
        let format = UIGraphicsImageRendererFormat()
        format.scale = scale
        return UIGraphicsImageRenderer(size: size, format: format).image { _ in
            draw(in: CGRect(origin: .zero, size: size))
        }
    }
}
Challenges
Device-Only Features
Background removal requires the Neural Engine, available on iPhone XS or later — it cannot run in the Simulator. This means the only way to test it is on a physical device. A couple of things come up the first time you deploy to a real device:
- Keychain access — Xcode prompts for the Mac login password to access the signing certificate. This is expected and only happens once if you select “Always Allow”.
- Untrusted developer — iOS blocks apps from unrecognized developers by default. Go to Settings → General → VPN & Device Management → tap your developer profile → Trust. After that the app runs normally.
| Feature | Simulator | Device |
|---|---|---|
| Filters | ✅ | ✅ |
| Auto Enhance | ✅ | ✅ |
| Face Detection | ✅ | ✅ |
| Background Removal | — | ✅ |
Vision Segmentation Scope
VNGeneratePersonSegmentationRequest only detects humans — not objects, animals, or scenery. The photo must contain a person for background removal to work. This is a model-level constraint, not something that can be worked around in code.
Results
Filters
| Original | Vivid | Mono | Fade |
|---|---|---|---|
 |
 |
 |
 |
| Chrome | Noir | Warm | Cool |
|---|---|---|---|
 |
 |
 |
 |
Auto Enhance
| Original | Enhanced |
|---|---|
 |
 |
Face Detection
| Single Face | Multiple Faces |
|---|---|
 |
 |
Background Removal & Replacement
| Original | Transparent | Color | Photo |
|---|---|---|---|
 |
 |
 |
Insights
Split expensive operations from inexpensive ones. Computing the segmentation mask is slow. Applying a new background is fast. Separating them into two distinct steps made selection feel immediate while keeping the one-time cost explicit.
Core Image’s auto-enhancement is genuinely good. The autoAdjustmentFilters API produces noticeably better results on underexposed or poorly white-balanced photos without any manual tuning.
Image orientation is an easy-to-miss detail. UIImage carries an imageOrientation property that tells renderers how to display it, but the underlying cgImage bytes are stored as-is. Any time you pass a UIImage to a framework that reads raw pixel data, normalize orientation first.
Source code on GitHub